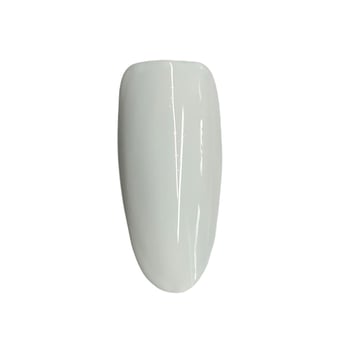
1. Apply to thin layers of SHELLAC Cream Puff. Cure each layer using button 2S.
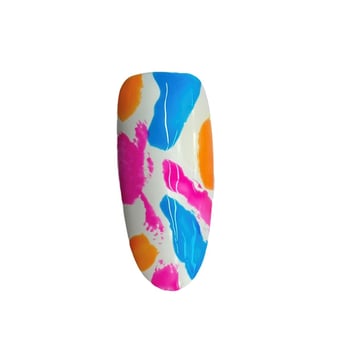
2. Make different patches of color with SHELLAC. Here we used the colors Popsicle Picnic, Museum Meet Cute and Pop-Up Pool Party from the SUMMER CITY CHIC collection. Do not cure.
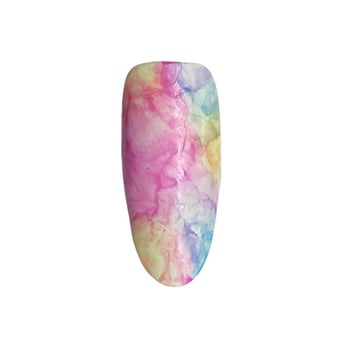
3. Use a brush moistened with TopFinish/IPA and dilute the colors to a color washed look. Moisten the brush as needed until the desired design is achieved. The colors should look like you had used watercolor.
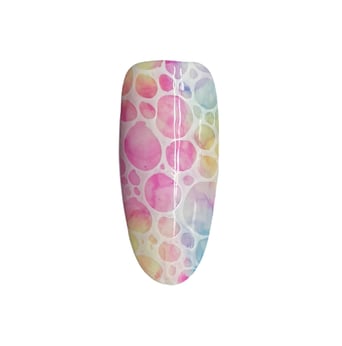
4. Leave to air dry for about 10 seconds, so the TopFinish/IPA evaporates from the surface. Cure on button 2S. Apply a thin layer of XPress5 Top Coat and cure on button 3. Remove the top film with a wipe moistened with TopFinish/IPA.
5. Apply :YOURS Stamping Polish onto the chosen plate. Scrabe in a 45 degree angle using a light touch. Using a light touch will prevent removing too much polish, resulting in not being able to pick up the stamp. Roll the stamper over the design to pick it up and transfer it to the nail. Apply a layer of SHELLAC Matte Top Coat and cure on button 3. Remove the top film with a wipe moistened with TopFinish/IPA..