What is Glitter Gel?
Glitter Gel is a mix of gel and loose glitter pigments, that can be applied over either gel or acrylic. When applied to the nail, it must be cured in a UV/LED lamp as regular gels. Some of the reasons many professional nail techs prefer Glitter Gel to regular loose glitter is that it is not as messy to work with and there is much less product waste.
How do you apply Glitter Gels?
In this article, Glitter Gel application has been divided into 2 categories: Overlays & Encapsulation. These 2 methods differ in their application technique and the result.
How to apply Glitter Gel as an overlay
Glitter Gel can be applied as an overlay over a finished filed nail. This is a great choice for regular clients who want a glitter nail when they come in for a fill and already have product on. Then you do not need to remove most of the gel or acrylic, you can just fill up with your preferred product, file, and put your glitter magic on top.
Steps to follow when applying glitter gels as full cover:
- Prep the nail
- Apply Tack Bonding Agent
- Build the nail with a hard gel, for example with any of the Lexy Line gels or JimmGels
- File the nail in shape
- (Optional: Apply Color Gel or ButterCream color gels for some color)
- Apply the Glitter Gel
- Finish with a top coat like Super Shiny for a high-gloss finish or Flat Matte for a matte result
Create a full cover Glitter Nail
When doing a full glitter nail overlay, you can achieve a lot of different looks by varying the product you put underneath. You can for example choose a full cover gel, a semi-transparent gel or a clear gel and then one or two layers of Glitter Gel on top. When applying Glitter Gel as an overlay it will not cover fully. If you want a full coverage look, you can apply a matching Color Gel or ButterCream color gel over the finished filed nail before you apply the Glitter Gel. To finish your design apply your preferred top coat. All these options will look amazing - what you should choose depends on the look you and your client are aiming for. Pro Tip:. Most Light Elegance Glitter Gels can be filed without damaging the glitter pigments.
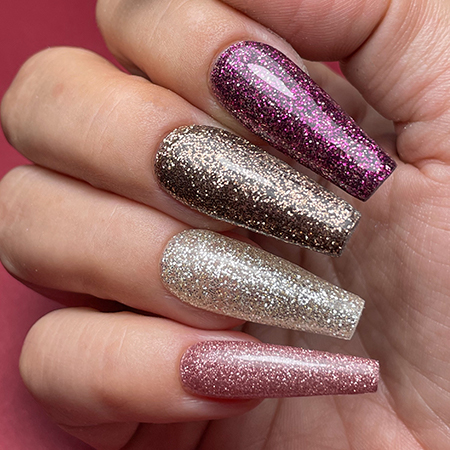
Create a Glitter Ombre Nail
 If you wish to make a glitter ombre look, you can also do this on top of a finished filed nail. Apply a little amount of Glitter Gel near the cuticle area, dry your brush with a dry wipe and gently use the brush to fade out the Glitter Gel towards the free edge. If you want to make a glitter ombre with more than one glitter, you can apply the different Glitter Gels and gently fade them together so there is no harsh division between the different Glitter Gels. Finish off with topcoat.
Common mistakes when applying Glitter Gel as an overlay
When I apply Glitter Gel as an overlay, my nail gets too thick and/or bumpy.
You might have applied too much Glitter Gel. When doing Glitter Gel as an overlay, you must apply it in one or two thin layers. Otherwise, you might transform your beautifully finished filed nail into a thick and bulky mess. If you want to smooth out the surface of the nail after you have applied the Glitter Gel, you can apply a thin layer of topcoat, gently buff the whole nail, and finish off with another layer of topcoat.
When I apply Glitter Gel as an overlay, I struggle to get the glitter pieces evenly spread on the nail.
This mostly happens with Glitter Gel where there are bigger pieces of glitter. You must use a light touch of hand when applying the Glitter Gel. When you have applied Glitter Gel on the whole nail, you can move the glitter around until it is evenly spread out. Use a nail art brush to have more control when doing this. Another great tip is to pick up glitter from the lit with a nail art brush and place the glitter where you think there is missing something on the nail.
How to encapsulate Glitter Gel
Instead of applying Glitter Gel as an overlay, you can also encapsulate Glitter Gel. This will give the nail more dimension and a full cover glitter look.
Steps to follow when encapsulating Glitter Gels:
- Prep the nail
- Apply Tack Bonding Agent
- Apply a thin base layer of hard gel
- (File the nail in shape if necessary)
- (Optional: Apply Color Gel or ButterCream Color Gels for some color)
- Apply the Glitter Gel
- Build the nail with a clear hard gel (Cool Gel is an absolutely clear cure hard gel)
- File the nail in shape
- Finish with a Top Coat like Super Shiny for a high-gloss finish or Flat Matte for a matte result
Create a full cover Glitter Nail
 When encapsulating Glitter Gel, it is best to use a crystal-clear gel-like the Lexy Line Cool Gel if you want the full effect and dimension of the Glitter Gel. The first layer of Cool Gel must be applied very thin and precise, otherwise, you might end up filing the Glitter away later, when you are filing the nail into shape. If you want an extra pop of color, you can apply Color Gel or ButterCream before applying the Glitter Gel. When applying the Glitter Gel, you can also build some of the structure. Apply a thin layer covering the whole nail (like a slip layer), pick up more of the Glitter Gel, place it where you want your apex, and gently wiggle it from side to side going towards the free edge. Be careful not to apply too much Glitter Gel around the cuticle area, the sidewalls, and the free edge. Encapsulate the whole nail in another layer of clear gel, file it into shape and finish off with your preferred top coat.
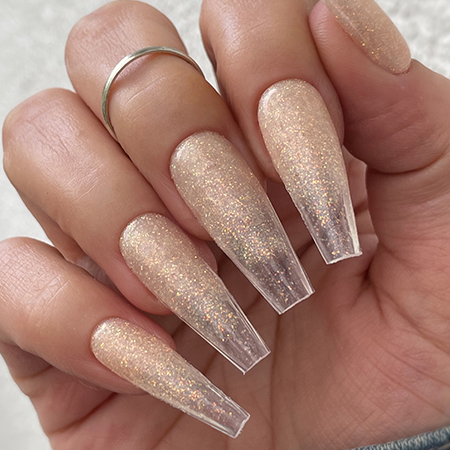
Create a Glitter Ombre Nail
 If you wish to encapsulate a glitter ombre look, you can use the same method as described when doing it as an overlay, just encapsulate it as you would encapsulate a full cover glitter look. Instead of doing a classic glitter ombre look, you can also do a reverse glitter ombre look. Apply a thin layer of clear gel before applying glitter on the free edge and fade it towards the cuticle area. Then apply a cover or semi-transparent pink gel near the cuticle area and gently fade it over the Glitter Gel. Encapsulate everything in a clear gel, file, and top coat. You can vary this look by doing the ombre near the cuticle instead or exchanging the pink gel against a white gel for a glitter milky bath look.
Common mistakes when encapsulating Glitter Gel
I always end up filing the Glitter off, when using the encapsulating technique.
There are a few reasons why this happens
- You have applied the first layer of gel too thick or uneven
- You have applied too much Glitter Gel around the cuticle area, the sidewalls, or the free edge
To prevent this from happening, you must be careful when you apply the clear gel and the Glitter Gel. If you are doing an extension, be sure the forms are also placed correctly and in relation to the shape you want the finished nail to be in. If the mistake has already happened, do not worry. You can fix it! If you see that you have applied to much gel before applying Glitter Gel, you can very gently file the excessive product off before applying glitter gel. Remember to wipe the nail with cleanser before and after filing. If you have already filed the glitter off, you can simply fix it by strategically placing Glitter Gel with a nail art brush where it is missing.
Bonus: Glitter Gel Tips & Tricks
The Glitter Pick-A-Boo
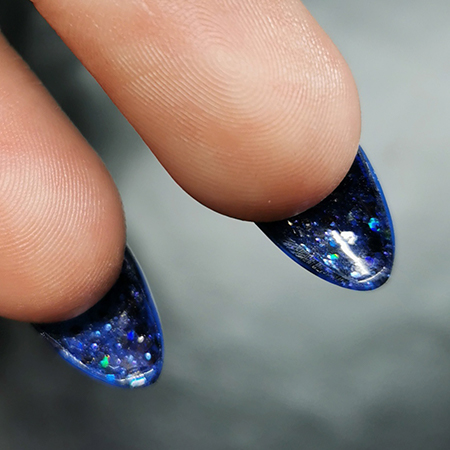 Using lovely details in your designs will lift your work to the next level and leaves a very professional impression with your client. When you put on the Pick-A-Boo design, you can see the glitter pigments only from underneath the nails. From the top the nails have a classic look.
Simply follow the steps as described in the section How to encapsulate Glitter Gel: Start with a clear gel before you apply the Glitter Gel It is enough to only cover the extended free edge of the nail with Glitter Gel. When the nail has been finished filed, apply your color and as always finish with top coat.
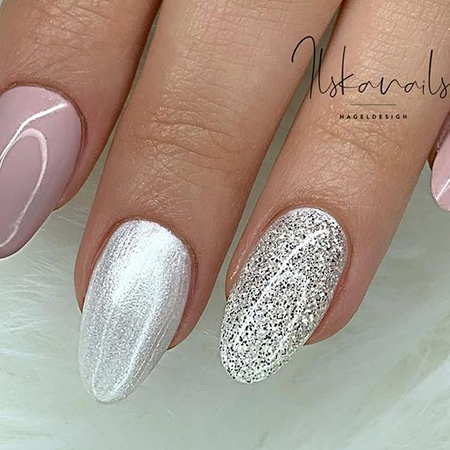
The Glitter French
 Spice up your Classic French nails with some Glitter Gel. You can either use the paint-on French technique or the Reverse French technique - just replace your white with some Glitter Gel.
The Glitter Cocktail Fill
When your client (with encapsulated Glitter Gel nails) comes in for a fill, you can fill up with a different Glitter Gel every time and then your client ends up with a cool and festive set of glitter ombre nails - almost like a glitter cocktail.
This article was written by Nadia Aicha Nielsen, Education and Brand Ambassador at Insight Cosmetics Group for Light Elegance.
Would you like to learn more about Light Elegance?
At Insight Cosmetics Group, we have a variety of contact and training options available to you.
- Why not simply book a consultation appointment with one of our experts?
- Discover the free e-learning app and take part in one of our exciting [BRAND] e-learning training courses
- Take a look at the training courses we offer. Whether face-to-face training or webinars - you are guaranteed to find your suitable training