STEP 1
P – PERFORM A DRY MANICURE
1. Have the client wash their hands with CND™ SCENTSATIONS™ Hand Wash and running water for 20-30 seconds and towel dry.
2. Massage COOLBLUE™ Hand Cleanser into the client’s hands.
3. If necessary, remove any existing nail color from the natural nail using an acetone-based polish remover (OFFLY FAST™ Moisturizing Remover) and a plastic-backed lint-free pad.*
4. If necessary, trim the length from each nail, using nail clippers.
5. Shape the free edge of each nail with a fine 240-grit file (Kanga™ File or Koala Buffer™).
6.
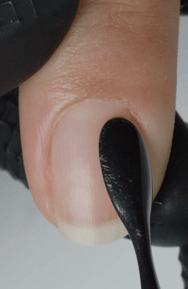
Gently slide a cuticle pusher along the nail plate toward the proximal nail fold (cuticle area) and along each lateral fold (sides of nail) to lift and loosen any cuticle (non-living tissue) from the nail plate.**
7.
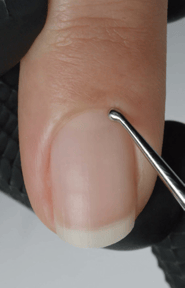
Gently guide a curette along the nail plate to remove non-living tissue on the nail.
8.
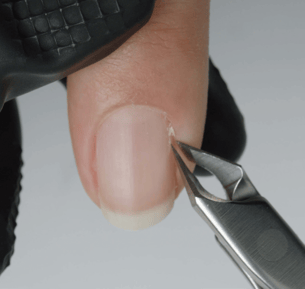
If necessary, use a manicure nipper to carefully remove any loose pieces of skin or hangnails.
R – REMOVE SHINE
9. Remove shine from the natural nail surface with a fine 240-grit buffer (Koala Buffer™) in the direction of the natural nail growth.
Optional: Use an enhancement prep bit at low speed with very
gentle pressure with E-File.
E & P – ELIMINATE SURFACE CONTAMINANTS AND
P – PURIFY NAIL PLATE LAYERS.
10. Thoroughly cleanse and temporarily dehydrate the nail plate layers with SCRUBFRESH™ using a lint-free, plastic-backed pad. Pull back the skin and scrub the nail as if removing red nail polish.
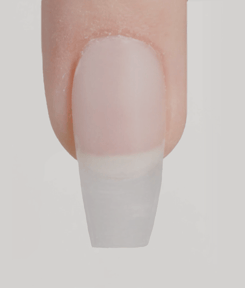
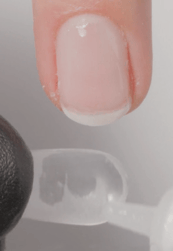
STEP 2
FIT THE TIP
1.
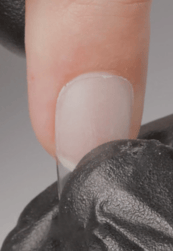
The tip should fit easily from sidewall to sidewall completely encasing the entire natural nail.
2.
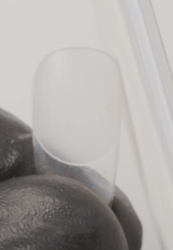
Pre-tailor the tip to fit the shape of the cuticle area and slim the sidewalls if needed using a 180-grit file.
3.
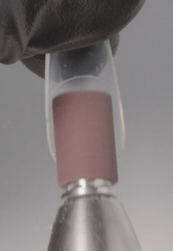
Remove the shine from the underside of the tip using a sanding band for E-File with a light touch to assure maximum adhesion of the tip to the natural nail.
STEP 3
APPLY THE TIP
1.
Carefully apply a small amount of adhesive to the surface of the entire nail plate leaving a tiny free margin along the cuticle area and sidewalls.
2.
Apply a small amount of adhesive to the underside of the tip where it will have contact with the nail. Use the pre-etched area as a guide.
3.
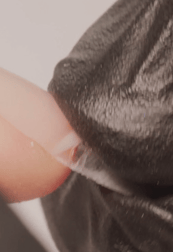
Place the cuticle edge or back edge of the tip at the cuticle line starting at a 45-degree angle and gently rock the tip down onto the nail while pressing firmly for complete contact.
STEP 4
PERFECT THE SHAPE
1. If needed, use an under nail cleaner bit for E-File on low speed with a gentle touch to clean the underside of the nail of any product that may have seeped out from the contact area.
2.
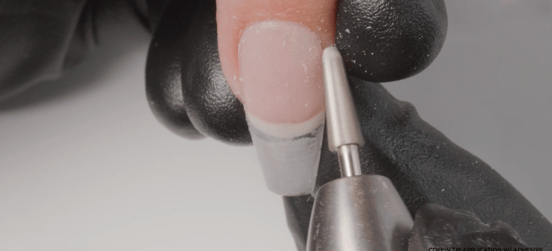
Blend and refine the cuticle area of the nail to a tapered edge using either a 180-grit file in a one direction stroke or a fine grit bit for E-File. This will ensure the tip is tapered to the nail and have a natural appearance when polished.
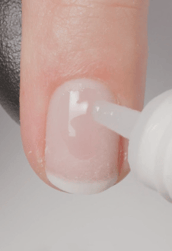
ADD COLOR
(Option for polish)
1.
Clean the nails using 99% Isopropyl Alcohol and a lint-free pad.
2. Shake CND™ VINYLUX™ Color vigorously to blend.
3.
.png?width=252&height=252&name=Untitled%20design(14).png)
Apply two thin layers of color coat to all 10 nails using the 5-point polish method.
4.
Apply a layer of CND™ VINYLUX™ Long Wear Shine Top Coat to all 10 nails.
5. After one minute, mist nails with SOLARSPEED SPRAY™ to reduce dry time and condition surrounding skin.
CND™ PRODUCTS REQUIRED
• COOLBLUE™ Hand Cleanser
• OFFLY FAST™ Moisturizing Remover
• SCRUBFRESH™ Nail Surface Cleanser
• CND™ Files and Buffers
• CND™ Coffin Tips
• CND™ SCENTSATIONS™ Hand Wash
ACCESSORIES/EQUIPMENT REQUIRED
• Adhesive
• Hand towels
• Plastic-backed, lint-free pads
• Disinfectable dust brush
• 99% Isopropyl Alcohol
• Cuticle pusher
• Manicure nippers
• Curette
• E-File*
• Disposable gloves
Would you like to learn more about CND™?
At Insight Cosmetics Group, we have a variety of contact and training options available to you as a professional beauty therapist.
- Call us under (DK) +45 3332 3322.| (DE) +49 (0) 221 920 490 | (AT) +43 (0) 720 881 062 | (CH) +41 (0) 415 880 432 | (SE) 08-40 83 82 33 | (FI) 09 31579233
- Feel free to write us an email to info@icgroup.dk.
- Discover the free e-learning app and take part in one of our exciting CND™ e-learning training courses