Liquid & Powder Natural Nail Overlay
Step 1: P.R.E.P.
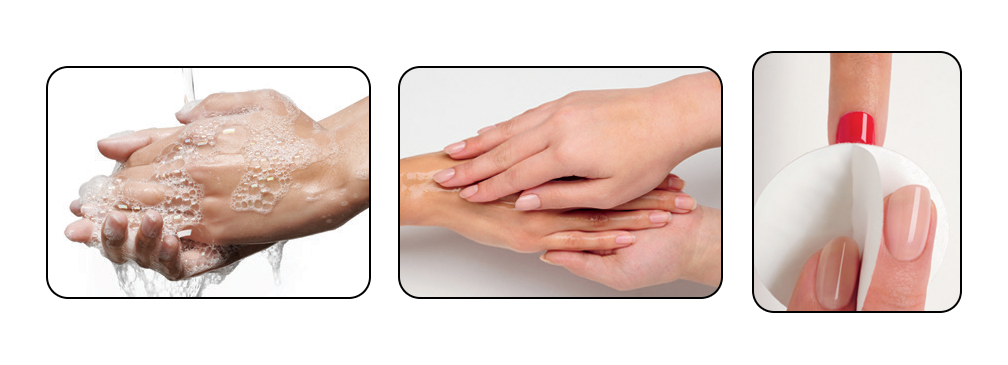
1. P - Perform a manicure
a. Have the client wash their hands with soap and water and towel dry.
b. Massage COOLBLUE™ Hand Cleanser into the client’s hands to cleanse skin.
c. Remove any existing nail color from the natural nail using an acetone-based polish remover (OFFLY FAST™ Moisturizing Remover) and a plastic-backed, lint-free pad.*
d. If necessary, trim the length from each nail, using nail clippers.
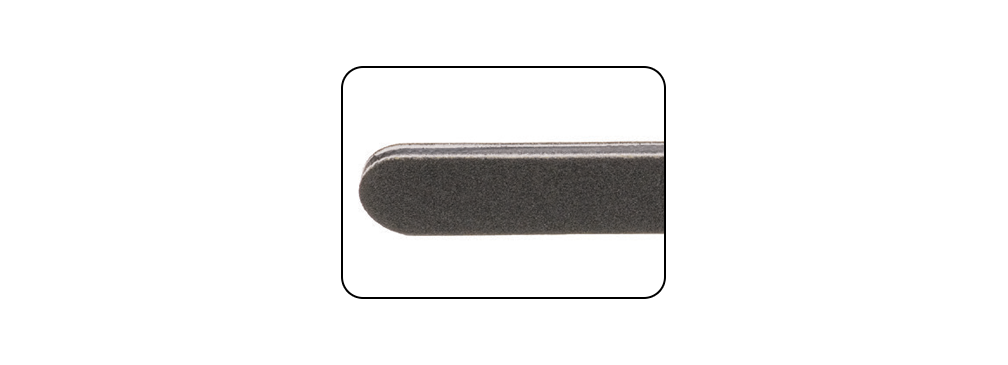
e. Shape the extension edge of each nail with the 240-grit side of Kanga™ File or Koala Buffer™.
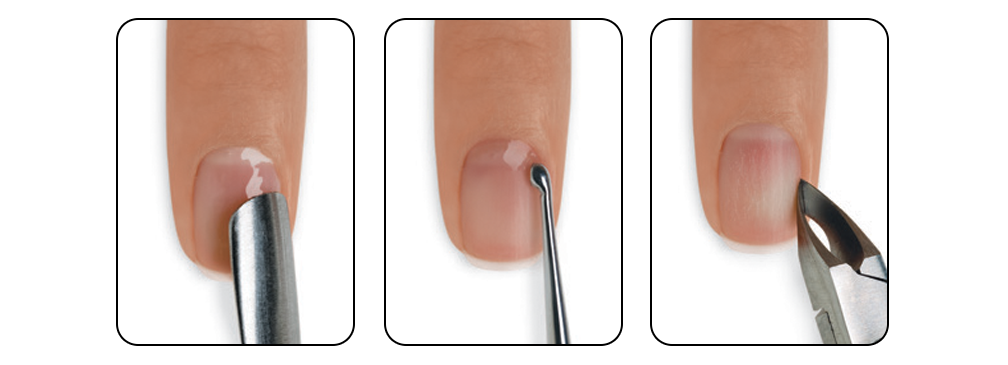
f. Apply a small amount of CuticleAway™ Professional Cuticle Remover evenly around the cuticle of each nail.**

g. Gently slide a cuticle pusher along the nail plate toward the cuticle area and along the lateral folds to lift and loosen any non-living tissue from the nail plate. Remove any excess CuticleAway™ from the nail and use a curette to remove non-living tissue up to the eponychium and lateral folds.
h. Scrub nails thoroughly with soap and a damp brush, then rinse with warm water to remove the cuticle remover and soap; towel dry.**
i. Use a manicure nipper to carefully remove any loosened, non-living tissue, as well as any loose pieces of skin or hangnails. Use a gentle touch during cuticle removal to protect the seals. Never cut living tissue as it can lead to infection.
* Dry P.R.E.P. is an excellent option for clients with great natural nails, who do not build excessive cuticle between services. Eliminating the wet cuticle treatment can shorten the service time and increase adhesion for some clients.
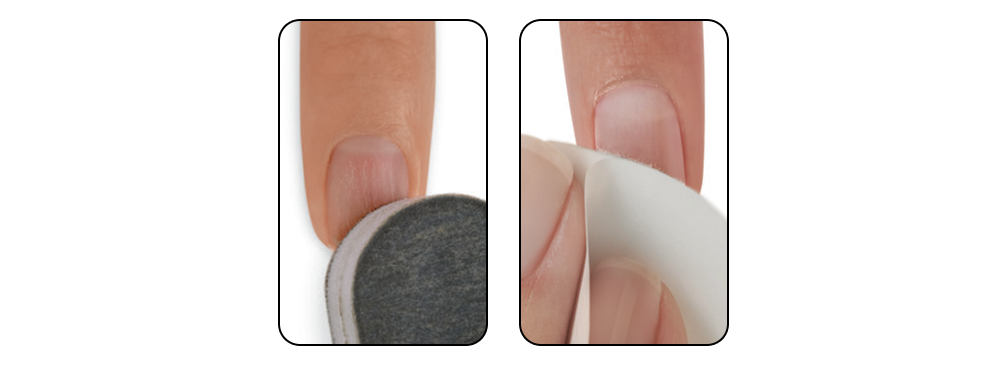
2. R – Remove shine from the natural nail surface with the 240-grit side of the Koala Buffer™ in the direction of nail growth.
3. E – Eliminate surface contaminants and P – Purify nail plate layers.
a. Thoroughly cleanse and temporarily dehydrate the nail plate layers with SCRUBFRESH™ using a lint-free, plastic-backed pad. Gently pull lateral folds back and scrub thoroughly to be sure all areas of the nail are completely clean.
STEP 2: Zone 1 - Extension Edge
1. Place a bead in the middle of Zone 1 near the extension edge.
2. Next, press the bead from side to side to fill in Zone 1. Use small, controlled presses and smooth, fluid motion. Smooth the entire Zone to ensure an even surface.

STEP 3: Zone 2 - Apex and Upper Arch
1. Place a bead in the center of Zone 2.
2. Press the product from side to side, concentrating on making complete contact with the nail plate. Keep the bulk of the product at the apex and taper to the sidewalls forming a thin edge, without touching the skin. Lightly feather any remaining product to Zone 1. Zone 2 should be the thickest part of the enhancement, protecting the stress area, where nails most often break. The highest point of the arch, called the apex, should be placed directly between the cuticle line and the extension edge for proper balance and beauty. From the apex, the product should taper to a thin edge in all directions.

STEP 4: Zone 3 - Cuticle Area
1. Place a bead in the middle of Zone 3 to complete the upper arch. Press from side to side until the entire area is covered, leaving a tiny free margin all the way around the sidewalls and cuticle area.
2. Check the enhancement for clean, continuous lines on both the upper and lower arch. Add product where necessary. Remember to use the highlight on the nail to look for high and low spots in the product.
A thin application in Zone 3 will produce natural- looking, long-lasting enhancements, as well as help prevent lifting.

STEP 5: Shape and Define
For a comprehensive tutorial of CND finishing techniques see the Enhancement Finishing Step-by-Step.
1. Refine the extension edge and sidewalls using the240-grit side of the Kanga™ File.
2. Shape and define the nail using the 180-grit side of the Hot Shot™ File, followed by the Boomerang Padded File.
STEP 6: Bring to a High Shine
1. Smooth the surface using the 240-grit side of the Koala Buffer™.
2. Apply a drop of SOLAROIL™ Nail & Cuticle Care to each nail and buff with the 1200-grit side of a Koala Buffer™ for scratch refinement. Rub any remaining oil into the nail and surrounding soft tissue.
3. Finish nails to a high-gloss shine with the Girlfriend™ Buffer, Glossing Buffer or Glossing Block.
As an alternative, skip the. SOLAROIL™ application above and buff with the 180-grit Boomerang Padded File. Remove any dust with a disinfectable brush and a plastic-backed pad saturated with 99% Isopropyl Alcohol. Apply BRISA™ Gloss and cure for one minute (preset button 3) in the CND™ LED Lamp (if using the CND™ UV Lamp, cure for two minutes). Then remove the top film with 99% Isopropyl Alcohol.Apply a drop of SOLAROIL™ to each nail.

PRODUCTS REQUIRED
• COOLBLUE™ Hand Cleanser
• OFFLY FAST™ Moisturizing Remover
• CuticleAway™ Professional Cuticle Remover
• SCRUBFRESH™ Nail Surface Cleanser
• RETENTION+™ or RADICAL SOLARNAIL™ Sculpting Liquids
• Perfect Color or RETENTION+™ Sculpting Powders
• CND™ Files and Buffers
• CND™ ProSeries Liquid & Powder Brush
• BRISA™ Gloss*
• SOLAROIL™ Nail & Cuticle Care
ACCESSORIES/EQUIPMENT REQUIRED
• Hand towels
• Hand soap
• Plastic-backed, lint-free pads
• Disinfectable dust brush*
• 99% Isopropyl Alcohol
• Cuticle pusher
• Manicure nippers
• Nail clippers
• Curette
• Dappen dish
• CND™ LED Lamp*
* Optional