We see it as our duty to help you overcome these struggles. In below article, we have collected the most frequent challenges to help shed light on why it happens and how you can solve the issue.
We invite you to read it carefully to be able to troubleshoot on your own application techniques and practice to become better and/or help your employees elevate their skills. Please know that you always are welcome to connect with us if you need further help with troubleshooting.
| My client complains of excessive heat / a burning feeling. |
| My gel is running into the sidewalls and cuticle area. |
PROBLEM:
My client complains of excessive heat / a burning feeling.
EXAMPLES OF WHY IT HAPPENS:
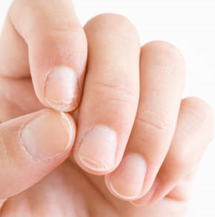
The nail is very thin.
Sometimes a client may have very thin nails, either by nature, by excessive filing, or by improper removal of the previous coating. This will cause them to be more sensitive to the exothermic reaction caused by the polymerization of the monomer-rich formula of PLEXIGEL™.
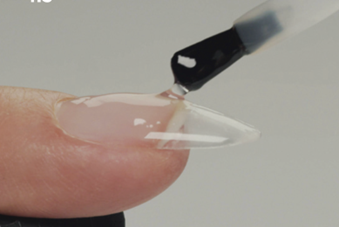
The application is too thick.
The thicker the layer of product, the more exothermic reaction it will produce during curing.
The output is not correct.
Every light-curable product should be cured in the lamp that has been calibrated to properly cure said product.
How to solve it
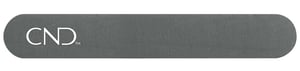
- Do not use anything lower than a 240-grit file on the natural nail. Only file gently in the direction of the natural nail growth during P.R.E.P. when removing shine.
- Control the thickness of PLEXIGEL™ and apply it in thin layers to prevent heat sensitivity. Apply a thin base layer first and cure, to insulate the nail and mitigate the heat sensitivity.

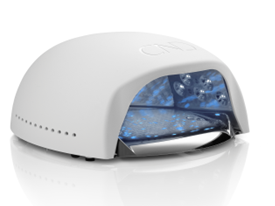
- Use the CND™ LED Lamp for proper output, since it has been calibrated to deliver proper cure to all CND gel enhancement systems.
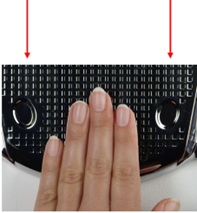
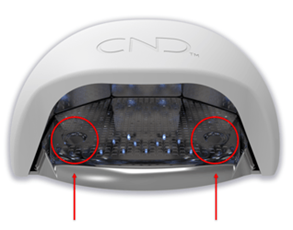
- The output of the lamp can vary depending on where the hand is positioned in the lamp. The closer to the LED, the higher the output. For sensitive clients, utilize the “flash-cure zone”, which will reduce output by 50%. This is the space between the two indentations on the base of the CND™ LED Lamp. Flash-cure the gel using the preset button 1 for 2-3 pulses prior to placing the hand in the lamp completely for a complete cure. Remember: to properly cure each layer of PLEXIGEL™, you need to use preset button 2B after flash curing.
- When sculpting on a form, flash cure the enhancement for 2-3 pulses in the CND™ LED Lamp. Remove the hand from the lamp and carefully remove the sculpting form for a full cure to align the nail to the proper distance from the LED.

PROBLEM:
My gel is running into the sidewalls and cuticle area.

EXAMPLES OF WHY IT HAPPENS:
The gel application is applied too thick.
If PLEXIGEL™ is applied too thickly before it can cure, the excess will flow from the apex of the nail and pool at the outer edges.
How to solve it
- Apply in multiple layers and cure each layer for the required time in the CND™ LED Lamp under preset button 2B.
- Lock each nail for 10 seconds under preset button 1, before moving to the next one. Then cure the whole hand for the complete curing time under preset button 2B.
The gel is runny.
When gels get warm, their consistency will thin, causing them to flow or run at a faster rate.
How to solve it
- Gels work at optimum performance between 180C to 270C (220C is ideal). Try to keep the temperature of the room you work in at these levels.
- Avoid using a high-wattage table lamp that produces excess heat.
PROBLEM:
The enhancement surface is uneven.

EXAMPLES OF WHY IT HAPPENS:
Did not view the enhancement from all sides.
PLEXIGEL™ will continue to “move” until it is cured in the CND LED Lamp. If the client turns their hand at a different angle, there is a chance that the bulk of the product will get displaced.
How to solve it
- Lock each nail for 10 seconds under preset button 1, before moving to the next one. Then cure the whole hand for the complete curing time under preset button 2B.
- Check each enhancement from all sides before and after curing to make sure that you have the right structure. If there is a low spot, you can always add more product, or move the existing product using the string technique.
Heavy hand
If you press and guide PLEXIGEL™ as you would L&P, you will end up with an uneven surface.
How to solve it
- PLEXIGEL™ requires a light touch during application, letting the product do the work. Use slow movements and allow PLEXIGEL™ to self-level.
- Use gravity to create the apex by turning the finger upside down after applying the product and before curing.
PROBLEM:
The enhancement is cracked at the stress point.

EXAMPLES OF WHY IT HAPPENS:
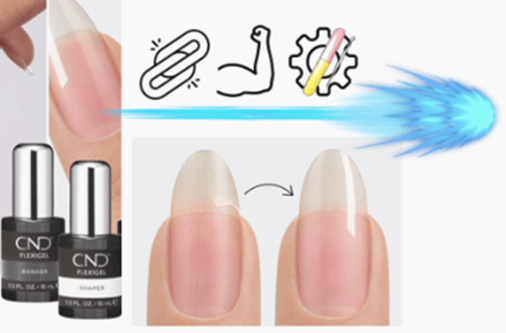
Wrong choice of product.
PLEXIGEL™ offers two options: Shaper and Builder. Understanding which one to use for each client and how to properly use them is important for the longevity of the service.
How to solve it
- If you want to add more length, use Builder. It has the strength to support the extra “stress” your enhancement will endure. That is true for both tip & overlay and enhancements built on a sculpting form.
- For clients who are more heavy-handed, you will need to use Builder for added strength.
Product is too thin.
Both Builder and Shaper require structure in their application. When they are applied too thinly, they will crack.
How to solve it
- Do not apply Shaper like you would a gel polish. Make sure to create an apex that will provide both shape and structure to a short nail.
- Practice your finish filing technique. Follow the CND™ protocol to help create a beautiful shape that is structurally solid and durable.
- When filing, make sure to look at the enhancement from all sides to avoid filing too thin.
PROBLEM:
My gel is lifting!
EXAMPLES OF WHY IT HAPPENS:
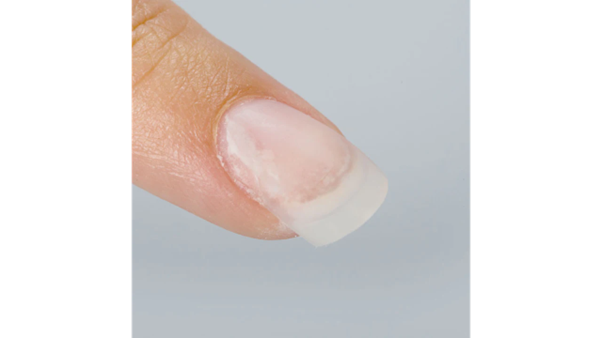
Improper adhesion to the natural nail.
If PLEXIGEL™ has not properly adhered to the surface of the natural nail, it will soon detach from it, creating lifting. This can occur at the lateral folds, the cuticle line, the extension edge, or even the center of the nail as pocket lifting.
How to solve it.
- When preparing the natural nail before application, gently remove the shine. If the nail is too thin, it will not hold PLEXIGEL™ , causing it to lift.
- Cleanse the natural nail surface thoroughly with Scrubfresh, including the free edge and under it.

- Review and perform steps of proper P.R.E.P.
- If you are getting pocket lifting, you may have not removed the shine from the nail surface, or it is possible that your client is suffering from hyperhidrosis or excessive oil skin, which can be transferred onto the nail. All these interfere with adhesion. In this case, use a PREP booster like CND™ NailFresh.
The natural nail has become dry and brittle.
Keeping a coating on a nail for a long period of time may interfere with the natural nails moisture and oil balance.
How to solve it
- Advise your client to apply SolarOil™ more frequently, not only to the surrounding skin but also to the underside of the extension edge, to keep the nail conditioned and flexible. The ideal frequency of SolarOil™ application is at least once a day, better yet if it is twice.
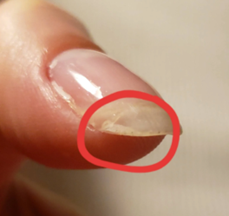
The seal is missing from the extension edge.
If the extension edge of the natural nail is not sealed, there may be caused a separation between the nail and the PLEXIGEL™ coating. The sealing will protect the natural nail, and hold the whole coating together, since PLEXIGEL™ (as all UV-cured products) will slightly shrink while curing and, therefore, will kind of shrink-wrap itself around the edges of the nail.
How to solve it
- Make sure to seal the extension edge with every layer of product you apply: from Bonder to Shaper or Builder, all the way to your Protector top coat, and including the layers of the color system you may choose to add on top.
- Do NOT shorten the nails after you have finished your application, because you will end up filing off the seal you have created. If you need to do that, make sure you apply at least one more layer of PLEXIGEL™ Shaper or Builder and seal your edge!
Lack of proper cure.
If you are experiencing lifting, at the free edge, or even the whole enhancement coming off in one piece, it could be due to improper curing of the product. This could be due to too thick application, wrong placement of the client’s hand in the lamp, even using the wrong lamp altogether.

How to solve it.
- Work with thin layers, especially when using Color Builders, to ensure that the light can travel through the whole layer and properly cure it.
- Ensure proper hand placement, as it may lead to insufficient The thumb should be placed in the alignment spot BEFORE pushing the buttons on the CND™ LED lamp.
- Always use the CND™ LED Lamp, the only lamp that has been calibrated to properly cure all CND™ UV light curable coatings.
Issue with the CND™ LED Lamp
Check if all lights in your CND™ LED lamp are working. If the bulbs are covered with product it can affect the curing. If all the bulbs are not turning on the lamp will not deliver a proper cure. Issues with under-curing can also be a result of not using the lamp that comes with the system. To ensure salon success you must always use the CND™ LED lamp.
Older versions of CND™ LED lamps may of course be used. However, we do not recommend the use of the CND™ UV lamp as that is a much older technology, and CND PLEXIGEL™ has not been tested with it.
How to solve it
- You should have a protocol for regularly checking the bulbs in your CND™ LED lamps. Bulbs and the inner surface of the lamp should always be kept as clean as possible. Start by educating your clients on how to insert their hands in the lamp to avoid them hitting the sides and the bulbs with their fingers. At the same time, ensure proper hand placement. Bulbs can be cleaned with a wipe moistened with Offly Fast™ Moisturizing Remover. Avoid scraping off any stuck product with a sharp tool.
The product is touching the skin.
When the product is touching the skin, either at the cuticle line or the sidewalls, oils from the skin can be transferred and interfere with the adhesion. Additionally, a gap may be created under that excess product, holding a bubble of air that will cause lifting. And if that doesn’t happen, the client will most probably be annoyed by that excess product touching their skin and will try to remove it, causing chipping and lifting.
How to solve it
- Control your brush during application and always leave a tiny free margin between the product and the skin.
- Flash-cure each nail to avoid the product moving or pooling before you have a chance to properly cure it.
Wrong choice of service
Even though CND PLEXIGEL™ Shaper and Builder can be interchangeable and work beautifully together, it is important to choose the right product for your service.
How to solve it
- Have a consultation with your client before the service. Discuss their activity levels, their lifestyle, and their commitment levels to ensure the correct choice of service and product.
- If for example your client is heavy-handed, very active with their hands, or wants longer enhancements, Shaper will not be strong enough for them. Choose Builder instead.
- For a better understanding of the use of CND PLEXIGEL™, we advise you to take one of our courses.
Would you like to learn more about CND™?
At Insight Cosmetics Group, we have a variety of contact and training options available to you as a professional beauty therapist.
- Call us under (DK) +45 3332 3322.| (DE) +49 (0) 221 920 490 | (AT) +43 (0) 720 881 062 | (CH) +41 (0) 415 880 432 | (SE) 08-40 83 82 33 | (FI) 09 31579233
- Feel free to write us an email to info@icgroup.dk.
- Discover the free e-learning app and take part in one of our exciting CND™ e-learning training courses